
The holidays are coming which means Christmas card season is upon us which means lots of envelopes to address and mail out. Next up on our Templett tutorial series, how to edit and print envelope templates using Templett app.
Of course, this tutorial will help for weddings, showers, birthdays or any event where you want to send out pretty envelopes when your handwriting isn’t so pretty. There are many options for envelope templates to select from… you can find some from my shop or other shops from ETSY. Either way it may help those with a do-it-yourself mentality to trim down the cost and get a lovely product you can happily send out. Your recipient will definitely be impressed with your “calligraphy” skills.
Read on for a step by step tutorial on how to edit and print an envelope template using the Templett app, part 3 in my Templett tutorial series.
This post and the photos within it contain affiliate links. If you purchase something through the link, I may receive a commission at no extra charge to you. Full disclosure here.
Templett is an online app you can use right in your browser without downloading ANYTHING! It’s as easy as using Microsoft PowerPoint, it’s that user friendly.
First off, you can purchase so many envelope template options from the ETSY marketplace. Search for “envelope templates”.
Of course, there are so many shops that sell templates you can choose from. The one from this example can be found here. You’ll also need A7 envelopes which can be found here.
The only requirement is you have to edit using your desktop computer or laptop. At the time of the writing, you aren’t able to use your phone or tablet to edit your information. Sorry. Maybe things will change in the near future. Hopefully. J
Once you purchase the template, you will be sent a login from Templett. Sometimes it ends up in your spam or junk folder so be sure to look there. If you don’t have the original link, you can still access your templates using the ETSY order number and the email associated with ETSY.
Step 1
Once login is successful, you will need to click on the “templates” icon to access your purchased templates…see below.

Step 2
You can now see all the templates you purchased appear. Simply click on the one you want to edit first. My template has both the front design to the recipient AND the return address for the back flap.
Step 3
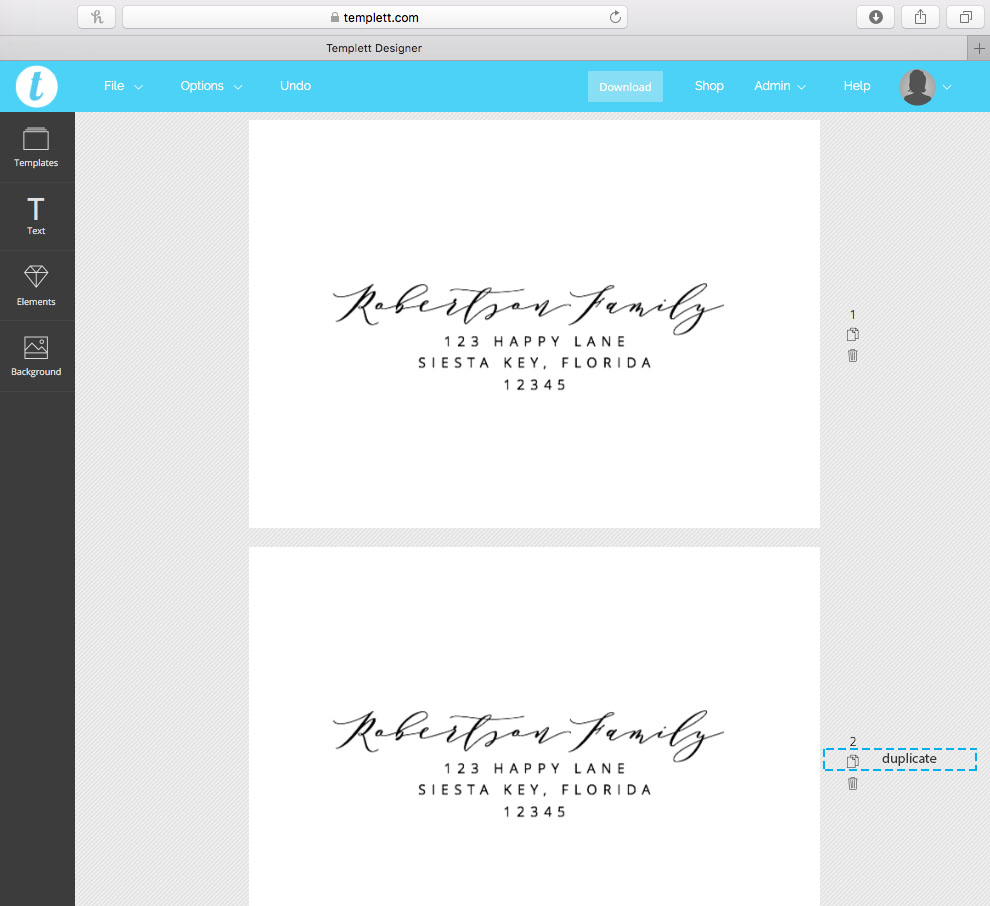
Now you can add the names and address for each recipient. Click on the text box to add the information.
Step 4
Click on “duplicate” (see above) to copy another envelope template and continue adding until you are finished. Templett allows for 36 names before you need to download the first set of 36 names then begin editing the next 36 names and so on.
*Be sure to check out my Part 1 Templett tutorial to walk you though all the ways you can change text…change the font…play with glyph for styling purposes…change font sizes…font colors…alignment…copy text…adjust styling to show all caps or all lowercase…change the space between lines of text…or change space between letters.

Step 5
Once all editing is complete and you’ve checked the spelling, date, event location, etc. you will need to download the file. DOUBLE CHECK YOUR SPELLING AS THERE IS NOT A SPELLCHECK in the Templett system at the time of this writing.
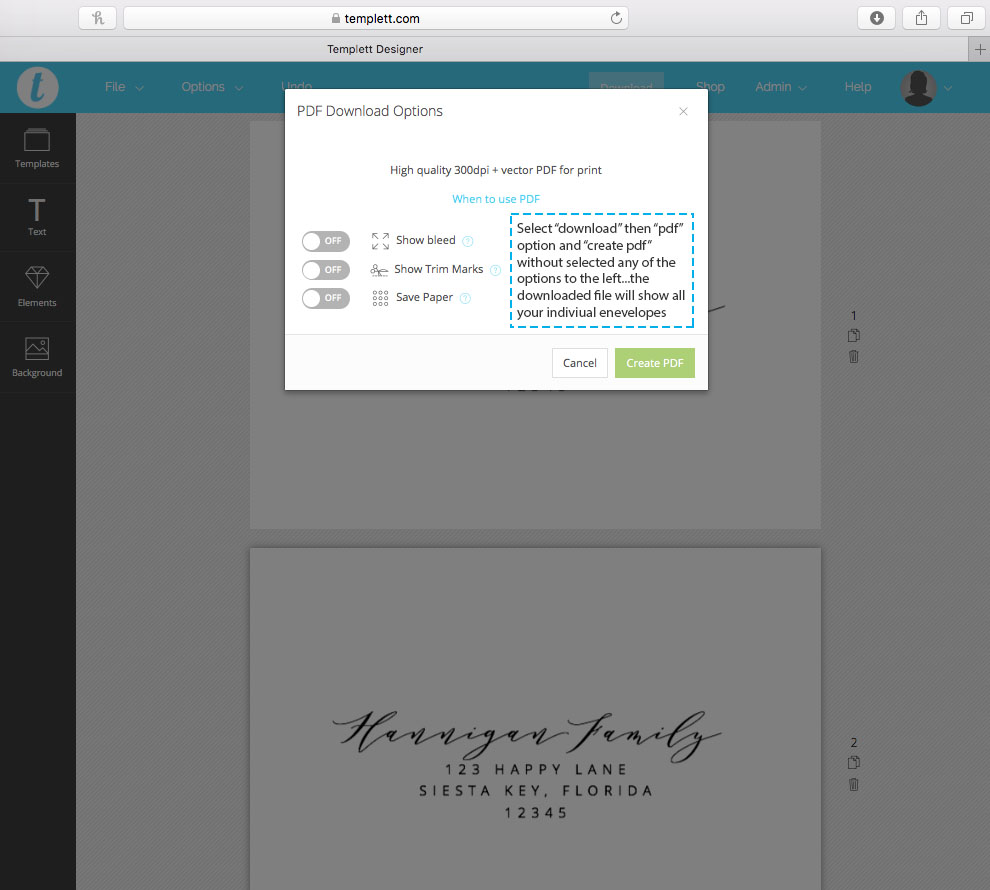
When you’re ready to download, click “download” which will prompt you to select from the dropdown menu…pdf, jpeg, and png options.
These instructions are for you to print envelopes at home…so select “download” then “pdf” option and “create pdf” without selecting any of the options on the left. The result is, the download file for the first 36 names will show EACH INDIVIDUAL ENVELOPES.
Templett will think for a few minutes while it prepares the file. Once it’s ready, it will show the prompt in the upper right hand side of your window…see below. Click on “download now”. You will be able to find it in your download folder. If you don’t see it, you can search for “templett” among your downloaded files and it will appear.
Step 6
Next up is formatting the printer. Keep in mind every home printer brand/model is different. You will need to google your particular printer or refer to the manual for specifics. My printer is the HP ENVY 5660 series.
On my computer(see below):
Once I click on “print” the bottom area shows “page setup”. There are many options for page sizes. While I didn’t see an option for an A7 envelope, I created a “custom” size and manually inputted the size for the A7 envelope I have which is 5.25” width and 7.25 height because that’s how my envelope feeds into the tray. Once complete, I click “ok”.

I also double check my orientation. My printer has the envelope entering on the side, so I select “landscape”.

On the printer:
I select paper setup and confirm my paper size as 5” x 7” instead of “letter” as it normally is set up to print.

I place my envelopes face down.

Then click “ok”. I do all my recipient first, then do the return address in bulk.
And there you have it! Perfect for your Christmas cards, Save the dates, Wedding invites, Birthday party invites, or any event where you want to give your envelopes a little special love even if you don’t have the best penmanship.

Hopefully my pictorial tutorial has helped you edit and print your template.
In case you missed it, check out the Templett tutorial series…
Part 1…How to edit and print a template using Templett
Part2…How to Add a Photo to your Photocard template using Templett
Part 3…How to edit and print envelope templates using Templett
Part 4…How to edit and print place card templates using Templett
Happy creating!
Gibb